

I am so excited to share a quick and easy tutorial with y’all today! (And I do mean quick – after I shot the tutorial I did a time trial to see how fast I could make one without pausing to take photos of each step. Working at a normal, relaxed pace I completed the project in 9 minutes and 7 seconds. Told you it was quick!)
Quick but also super useful. You’ll use this every day (if you use a flat iron or curling iron every day) and it’s especially handy if you’re traveling or going to the gym because you won’t have to wait for your iron to cool before packing it away.
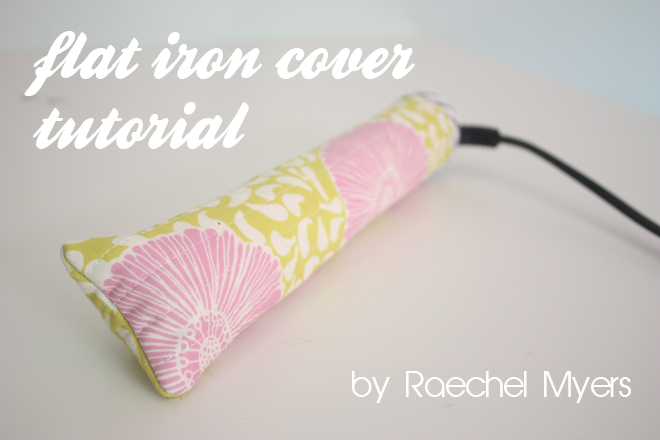
Y’all, I’m so pleased to share with you, my quick and easy Flat Iron Cover Tutorial!

What you’ll need:
11″x6″ pieces of the following three fabrics: Insul-Bright, pretty cotton fabric (for outside), and plain cotton fabric (for inside) {I used Sugar Pop Summer Flowers from Sew Fresh Fabrics for my main fabric}
You’ll also need about 7″ of 1/2″ double fold bias tape – buy some or make your own
Coordinating thread
Tailor tape

You’ll also need a sewing machine. You know I’m rather attached to mine. :)

Getting Started:
Using your tailor tape, measure the circumference of your flat iron (or curling iron) at the widest point.
Also, measure the length.

Now, if you have a Chi, the work has been done for you. You can use my measurements. If not, I’ll show you how I did my work so you can adjust yours accordingly.

A few notes about my notes: after I made these notes, I adjusted the width of the cut to 6″ instead of 5.5″ and it’s good that I did – I needed that extra wriggle room. Also, I suggested the use of home decor fabric on my notes – that’s probably the very best (I made one about a year ago with home decor fabric and it’s been great and kept the warm inside), but quilting weight fabric will work as well. The Insul-Bright is good stuff.
Now, cut your three pieces to the size you’ve determined. And we’re on to the quilt sandwich!

Lay your three fabric pieces in a stack, plain cotton first, then Insul-Bright, then your pretty fabric (right side facing up) and pin in place.
Now, quilt your cute little stack. Beginning on the right side, stitch several lines, each 1/2″ from the next to make your quilt sandwich all one piece.

You may need to square things up when you’re finished if your pile shifted at all.
You’re already halfway finished!

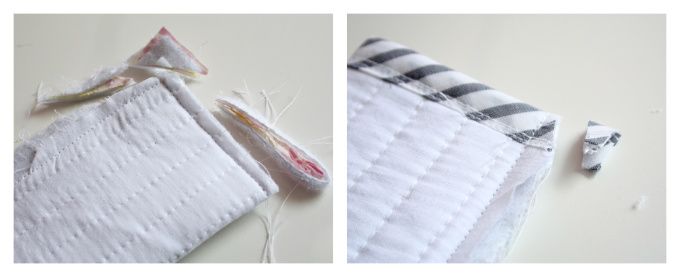
Now take your piece of bias tape. Open it up and tuck one of the short ends of your quilted piece into the crease of the bias tape. Stitch the bias tape onto your quilted piece, close to the end. (You’re only catching one side of the bt this time.)


Trim the excess off the corners, then turn it right side out (a dowel rod or pencil are both useful for this maneuver).
And…

It’s all pretty and tidy AND functional!

Just slip it on your hot flat iron and run! Hurrah!

As with all of my tutorials, you are completely welcome to use this tutorial to make items for sale in your Etsy shop or at craft fairs and such. I’d love it if you would share a link back to your source (me!) and I always love to see what y’all make with my tutorials, so please share them here.
Have a lovely Tuesday, friends! What are y’all up to this week?
**Update** For a limited time I am selling flat iron cover kits in my Etsy shop. I am also taking custom orders for flat iron covers this week only. More details here.
Disclosure of Material Connection: I received the Brother NX800 machine mentioned above for free in exchange for a mention of the product in my blog. Regardless, I only recommend products or services I use personally and believe will be good for my readers.
>Will you be selling these on Etsy at all? I would love one but I have absolutely no idea how to sew though.
>cant decide if i should be embarrassed or proud of how fast i made this, tweeted it and uploaded it in your flickr.
>A few weeks ago I decided to make something like this to hold ipads or kindles for my kids' teachers. However, any quilted material (Vera Bradley-ish) is ugly and expensive. So my question is, how do you ensure such straight lines when machine quilting?
>not that i want to be gross, but this would work great for sex toys, too.
>Cute! Glad I have a Chi because I just don't do math! Did you make your bias tape, or buy it, and what size BT maker do you have?
>I'm making one ASAP! I'm also glad to not have to do the math! :)
>You are awesome. That is all :)
>That is so cute! And I am totally LOL at Sandra!!
>totally gonna make one of these for my cousin this Christmas!
>This is exciting! I needed a last-minute "finisher" gift to put in my stash for my friend's birthday tonight. Found this tutorial, headed to joann's yesterday and bought a fat quarter and bias tape for $3! Now it's naptime, so I'm off to make this (and will probably (hopefully) have enough time to make chili for dinner before the babe wakes up!). I had eyed up some much more complicated versions (involving zippers…yikes) in the Walmart clearance section a few weeks ago and was trying to come up with a DIY version. This is perfect. Thanks!
>Great idea! :) thanks for the tips. Now I can make my Karmin G3 salon pro flat iron, look better
I don’t understand what you mean by catching only 1 side of the bt. Could you clarify?
Haley – I’m talking about the bias tape. Sorry there’s no photo – weird that I didn’t include one!
Your bias tape should be folded in half lengthwise and (kind of like a clip) will close onto one of the 6″ long ends of your quilt sandwich.
You will use two steps to attach it. With the right side of the quilt sandwich facing up, lay the bias tape (bt) open and set the edge of the quilt sandwich (qs) into the crease of the bias tape. Now stitch to attach the qs to the top of the laid-open bt.
Now fold the remaining half of the bias tape over the front (pretty) side of your quilt sandwich and stitch again (going through all the layers).
You’ll want to make sure that your first stitch (the one attaching your qs and the bottom part of your bt) is low enough that it won’t show above your second stitch.
Hope this helps, Haley!
Got it! Thanks!!
Oh Goodness. I just made three of these today out of some pretty flamingo fabric. I can’t get over how easy they were to make. Thanks so much for a clear and easy to understand tutorial. Now to start making them for Holiday Gifts.
Found you on Pinterest. I want to make one of these for a friend, she wants it for her granddaughter and she tells me that she has a travel size Chi. Since I don’t use a flat iron, I have no idea what size that is! Are the measurements on your tutorial for a regular size Chi or a travel size?? Thanks so much for your help :)
Hi Sandy!
The measurements on my tutorial are for a regular sized chi. I wonder if you could find the dimensions on Amazon? Is this it?
I got the dimensions, thanks for your help. BTW, it is not listed above, but I am assuming from the photos that after you apply the bias tape, you fold it in half, right sides together, and then sew it? After that is when you turn it right side out – is that correct?